We love single-page applications: they can be incredibly fast and offer a wonderful user experience. As developers, we love challenges, but one thing we didn’t see coming was the difficulty of Google Tag Manager with React applications. Here’s a quick guide on configuring your tags and triggers, hopefully it will save you some time. Spoiler alert: our solution is based on the “Custom Event” trigger in Google Tag Manager.
Your step-by-step implementation guide
Step 1: Installing GTM
We will start with installing an essential Javascript module called “react-gtm-module”. Go to your React based app project directory; enter “npm install react-gtm-module-save” in the terminal and install the GTM module for React based apps. If you haven’t used package managers before, check out this link.
Step 2: Configure your index.js file
Next, you should insert the statement “import TagManager from ‘react-gtm-module’”in your “index.js” file which allows your app to initialize the Google Tag Manager module that we installed in the first step. Below the import code line insert a code snippet right above the ReactDOM.render section (as shown below) and don’t forget to replace ‘GTM-XXXXXXX’ with your own app’s GMT Container ID:
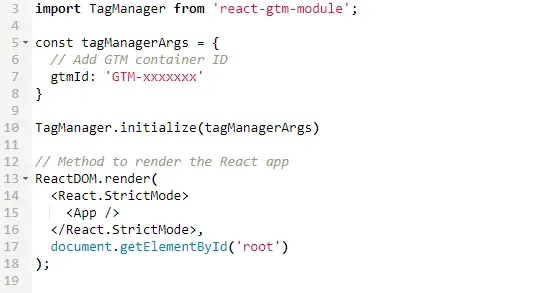
Once you complete this step, your Google Tag Manager is able to track pageviews on all your app pages. You may say “This sounds great! We’re all done here.”, but unfortunately, this basic configuration is not enough. You still need to customize the tags and triggers for pageviews and events in your app.
Step 3: Tracking pageviews and specific events
The default GTM pageview trigger is fired only on page load. It won’t fire again unless you refresh the page. This is because React renders each page component separately: switching between different pages means re-rendering some of the React components, instead of reloading the whole page.
If you would like to track all the “history” of users, please read the section on “How to track pageviews”. If you’re interested in tracking specific events, such as button or link clicks, please refer to the section on “How to track specific event(s)”.
How to track specific event(s):
To track a button click or a link in your app, go to your code where you add the button. In the “ onClick ” method, use the window.dataLayer.push command to send your custom event to a GTM datalayer (if you’re new to datalayers, here’s a good explanation from Google). Here’s a code snippet that can help you. Just replace ‘buyNow’or ‘button-click’ with your own event name that matches your GTM trigger configuration:

Of course you can customize the “Category”, “Action” and “Label” fields to match your needs. we just used the button name here.
To set up the corresponding trigger, please see below screenshot for an example:
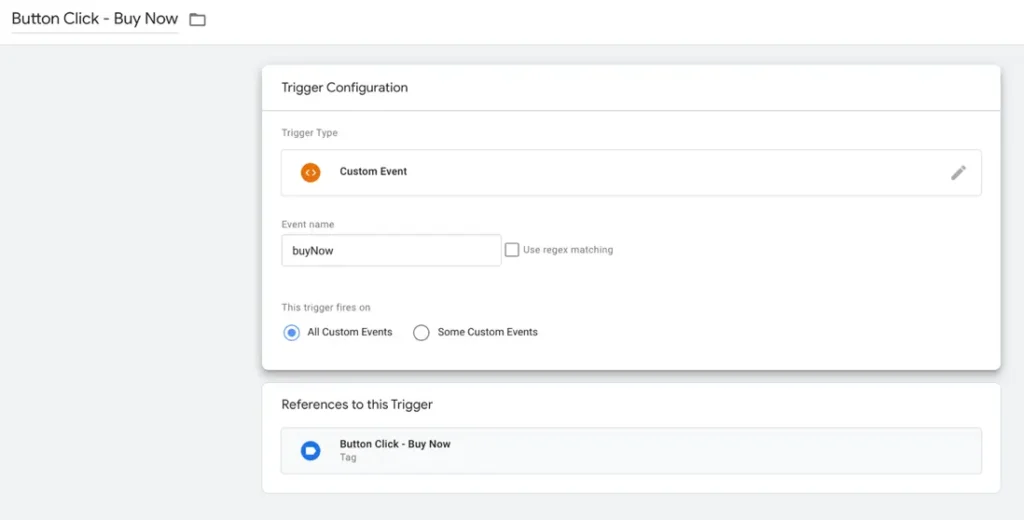
Again, you should customize the “Event name” field, but you need to make sure that it is identical to the event name that you added to the “onClick” method in the code snippet.

Pro tip: “The value of the event variable in your onClick method must match the name of your GTM trigger.”
How to track history pageviews on all pages:
Normally, tracking pageviews is one of the easiest things to do in GTM. Add a base tag for Google Analytics, pair it with an “All Pages” trigger, and you’re done. However, React and other single-page applications require a bit more work. To track pageviews, you can use the “History Change” trigger.
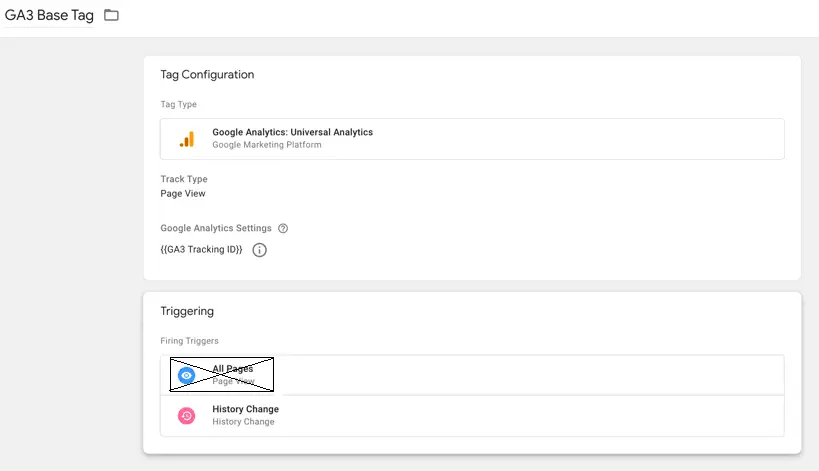
You can select any tag name you’d like, but make sure that the Google Analytics Settings variable matches the GA3 or GA4 Tracking ID of your own app project. Please note that, if you use the “All Pages” trigger, the trigger will only fire once, unless users refresh the page. That’s why we use the “History Change” trigger instead.
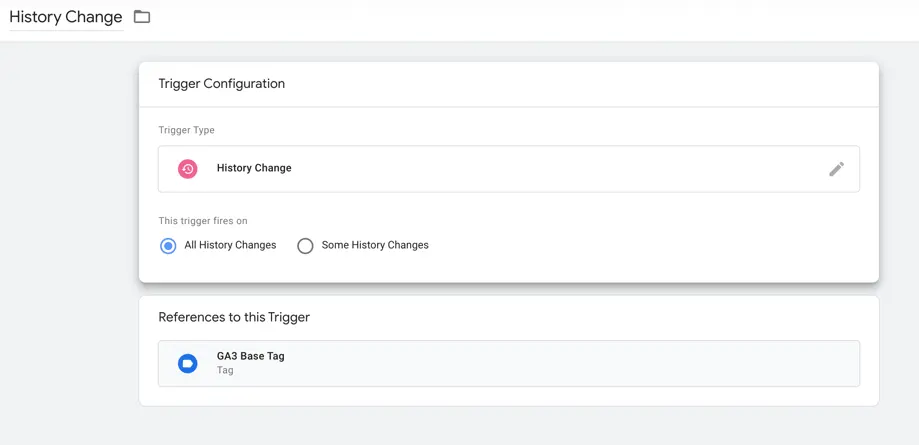
To set up the corresponding trigger you can use the configuration below:
How to track a specified page:
To track the pageviews of specified pages, you can configure the tag and trigger in a similar way as you did to track pageviews on all pages.
Here’s an example of the trigger configuration:
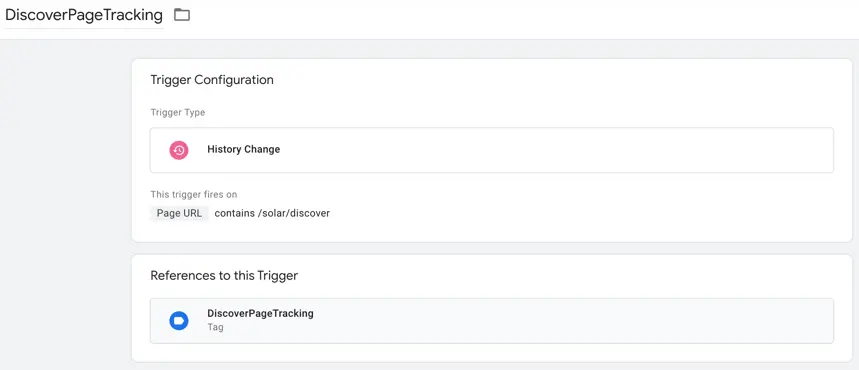
Here we use “This trigger fires on” “Page URL” “contains” “/solar/discover” to track visit history of the page that has “/solar/discover” in the URL path. Just change the path to match the URL of a specific page on your website if you’d like the tag to fire only on that page.
Congratulations! You now have a robust and easy way to use GTM in your single-page applications. If you found this guide useful, please share Plumfind Academy with your friends and colleagues. S ign up to our “Plum Friends” emails for more tips, guides and best practices on analytics. Thanks for reading!
About the author(s):
Jingfei is our software engineer. She can magically convert our craziest ideas into well-optimized chunks of code. Her unbounded energy and can-do attitude keep our technical teams running like a well-oiled machine. We suspect that the source of her energy is the classics: she loves opera, her favorite composer is Mozart and in another life, she could have easily been an archeologist. She lives in Montreal, Canada.
Sasa is our software engineer, but she does so much more than coding. With a double major in computer science and business, she can connect all the dots and bits that lead to an amazing user experience. Software is not her only passion, mind you. She is an avid pastry chef and a keen hiker. She lives in Montreal, Canada.